Once you have completed the plastering and lining of the ceiling, waterproofing will be the next step. Your bathroom, laundry room, kitchen, and powder rooms will all need waterproofing. If you have a basement, you may want to waterproof it.
Incorrectly installed waterproofing systems have caused damage to Australian homeowners over the years. To fix this problem, waterproofing requirements have evolved.
DIY Waterproofing
You might be wondering if it is possible to waterproof your home yourself. You must have a permit to waterproof your Queensland or NSW home. Although you don’t need a license to work in other states or territories, it’s important that the repairman guarantees that their work will conform to the Australian Standard AS3740–2010, which is the minimum level of waterproofing protection that your house can receive. These standards must be met, and you need to get approval from a building inspector. You should also consider who and what waterproofing will be done. This could adversely affect your warranty or insurance claims. Waterproofing can lead to serious damage to your home from damp and water if it is not done correctly.
Waterproofing: The Process
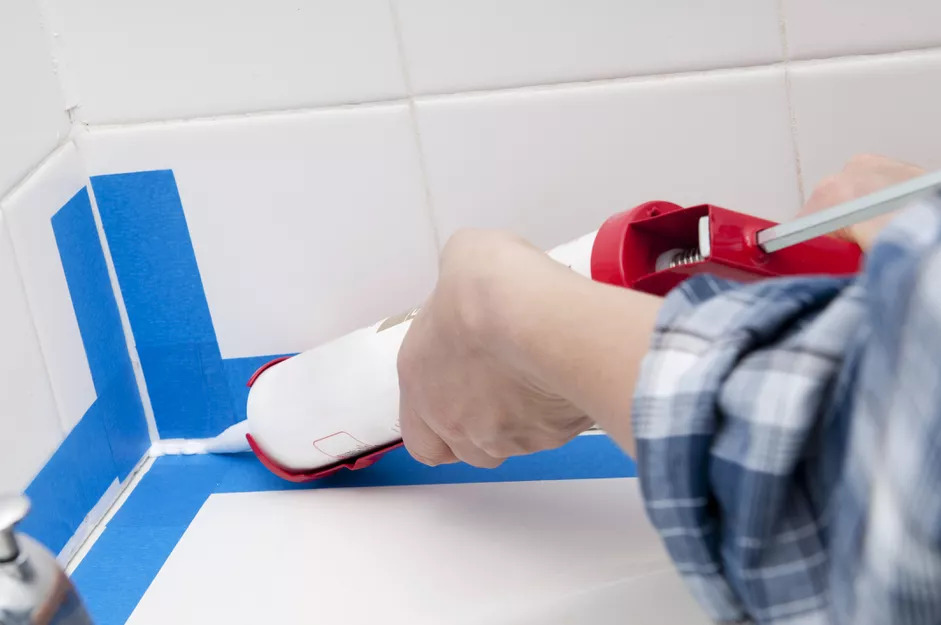
In Australia, waterproofing involves applying a liquid rubber membrane to areas that are vulnerable to water. This serves as a kind of “seal” and prevents water from damaging the areas you have waterproofed. Start by sealing corners and edges using a compatible ‘neutral cure” silicon. Next, you will need to create a bond breaker over these joints using a polyfab bandage. The bond breaker’s flexibility allows the waterproofing membrane to separate at joints. This ensures that any slight movements experienced by the building do not cause damage to the membrane. Bond breakers will be needed around tap outlets and drains. The best place to attach the waterproofing membrane is below the edges of the polyfab wrap. This is so the waterproofing membrane is not easily ripped off the floor or wall. The next step is to paint the membrane using a roller ( select the best paint roller for the best results). Two coats are required for painting. One coat can be rolled vertically or horizontally, while the other one is rolled at right angles.
These are the Best Places to Use Waterproofing
You should target areas where there is water supply if you want to waterproof your home. These areas include bathrooms, shower stalls and kitchen wet areas.
The area you are waterproofing as well as the materials used will determine the floor and wall height. For example, 1800mm is the ideal waterproofing height for shower recesses. The distance between the wall/floor (and the waterproofing membrane) will depend on factors such as the size and type of the shower enclosure, the partial or complete enclosure, and whether the base is pre-moulded.
The type and extent of waterproofing depend on what materials were used to make the bathroom floor. If your bathroom floor was made of plywood or particleboard, then you must waterproof it 100%. However, concrete floors made from compressed fibre cement or concrete may have water-resistant properties.
Placing the Tiles up
After you have installed your waterproofing membranes, allow it to heal for a few days before you start putting up the tiles. If you have a built in shower base, make sure to fix the mortar or screed before installing the tiles. It is not difficult to put up tiles. The process can be broken down into the following steps.
- Selecting the right tiles. Selecting the tile style or type you prefer based on their slip resistance.
- Selecting a pattern. This stage is where you decide on the best way to align the tiles with the floor and wall joints, as well as the location of the first tiles.
- Cut the tiles to fit the intended places.
- Use of mortar or tile adhesive. This adhesive is applied to the tile’s surface before the tiles can be fitted. To allow for grouting, you must be careful when fitting the tiles.
- The installation of the tiles. The tiles should be left to set for at least one day after being fitted, particularly for heavier floor tiles.
- Spacers must be removed. It is necessary to remove spacers from the tiles and grout the gaps.
- Final cleaning. This is where you remove any grout or debris and allow the grout to set itself.
The Ideal Time for Waterproofing and Tiling
It all depends on how many people are involved. The project will take at most one week to complete due to the mandatory waiting periods for waterproofing and tiling.


